Dynamite Shrimp


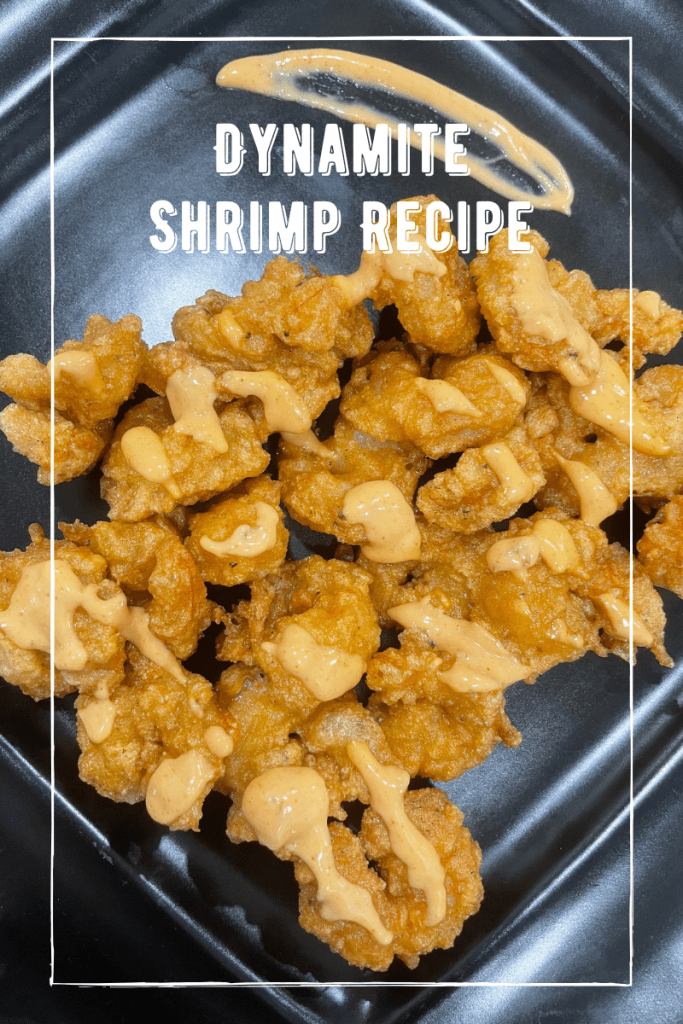
Whenever I go to an Asian restaurant, one of the first things I order is dynamite shrimp! It’s always fried to perfection and the sauce is so delectable. I’ve been loving the P.F. Chang’s Dynamite Shrimp since I was a kid and over the years, I’ve tried to perfect the recipe. This is a hit in my household and I’m repeatedly asked to make it all the time! I’m finally sharing the recipe with you guys below! I hope you enjoy it and like it as much as I do.

Please don’t hesitate to message me with any questions and please do share your photos with me if you decide to make it!

xo,
S

Dynamite Shrimp

  • Servings: for about 4 people
  • Difficulty: 3
  • Print

A tasty recreation of the dynamite shrimp you eat at asian fusion restaurants. Crispy and delicious! A perfect snack or appetizer for everyone!


Ingredients

  • 1 bag of medium frozen shrimp – cooked, peeled, deveined
  • 3/4 cup cornstarch
  • 1 tsp salt
  • 1 tsp black pepper
  • 2 eggs
  • 1/2 cup mayonnaise
  • 1/2 tbsp ketchup
  • 1/2 tbsp honey
  • 1 tsp paprika or cayenne powder
  • 1 tsp sesame oil
  • 1 tsp rice vinegar
  • Sriracha according to preference/spice tolerance. (I add about 4-5 tbsp because I prefer a lot of spice)

Directions

  1. Take the shrimp out of the freezer and wash with cold water in a strainer. Set aside for 15 minutes to thaw for a bit. Take off the tails and place all of the shrimp on a paper towel to dry for 30 more minutes.
  2. Meanwhile, take a large bowl to combine the ingredients for the sauce. Add mayonnaise, sriracha (by preference), ketchup, honey, paprika/cayenne powder, sesame oil and rice vinegar. Mix it all together and you should have an orange colored sauce. Set aside.
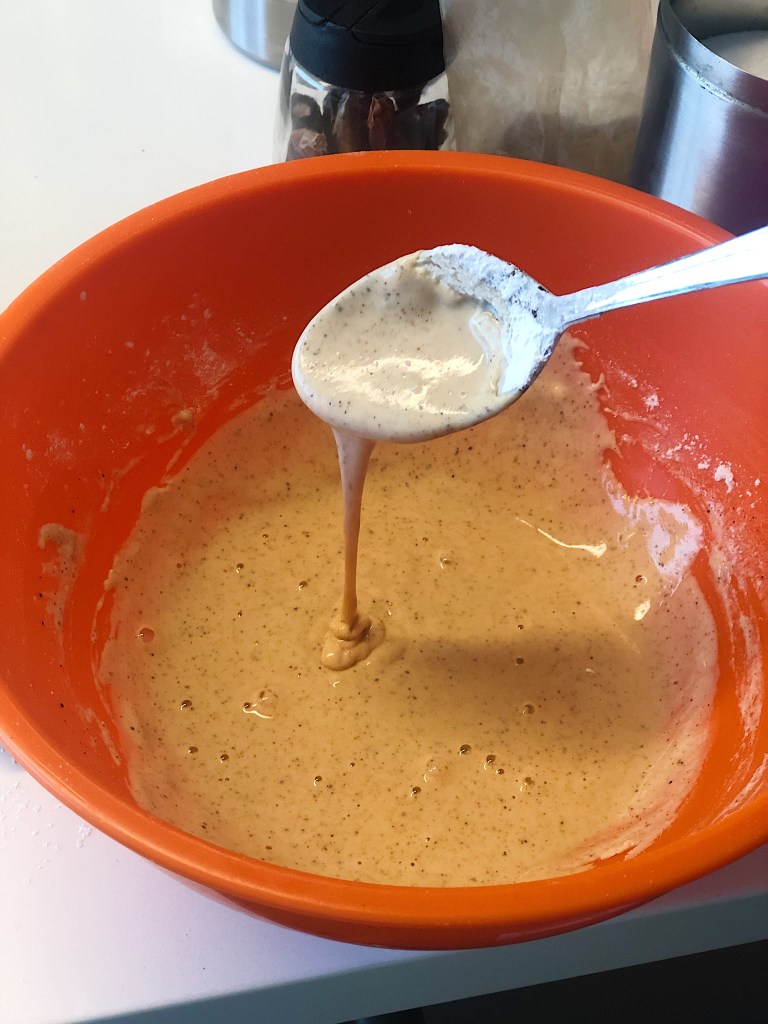
  3. To make the batter, take a bowl and add cornstarch, salt, pepper and eggs. I also add some sriracha to the batter itself to add some spice to the shrimp on its own. Whisk well until consistency is thick. If still on the thinner side, can add more cornstarch. It should be thick enough to properly coat the shrimp.
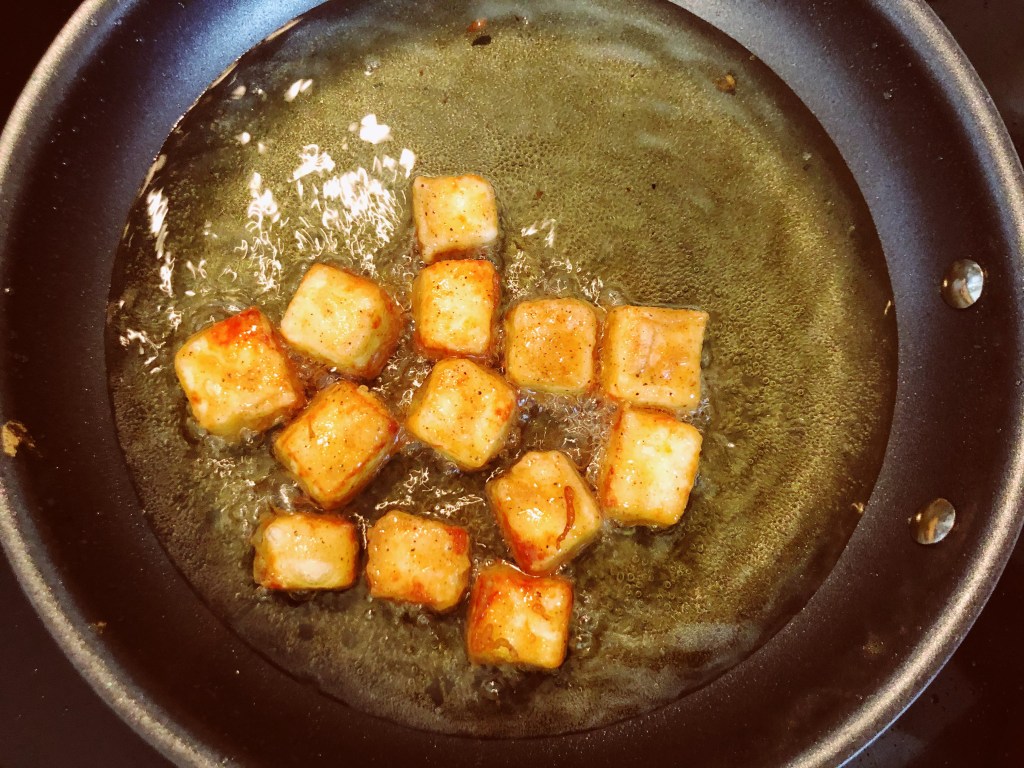
  4. Heat up the oil – enough to deep fry the shrimp. Keep on medium flame and fry the shrimp for 2-3 minutes until golden brown and crispy.
  5. Place shrimp on a plate lined with paper towel for one minute, so it soaks up some of the oil.
  6. Toss shrimp into the sauce right after to enjoy it hot and crispy. Can also just drizzle sauce onto shrimp if you don’t want it completely saucy, or use the sauce as a dip on the side.
  7. Enjoy!


Adding my reel below for visual reference:

Holiday Cocktail: Indian Fusion Eggnog (Somrus Nog)


Eggnog is a holiday drink staple, but what’s better than just simple old eggnog? Eggnog with an Indian fusion twist to it! My boyfriend is a cocktail connoisseur and makes the most delicious drinks on this planet (I promise I’m not being biased). He turned a regular eggnog into the most scrumptious and perfect holiday drink! I’m not a fan of traditional eggnog, but this was divine and a huge hit at our holiday party last year.

If you haven’t heard of Somrus before, you’re in for a treat. It’s so delightful to drink on its own, but even more so in this cocktail. It’s an Indian cream based rum liqueur (almost like bailey’s but better) with a symphony of flavors like rose, cardamom, pistachio, almond, and saffron. Imagine a delicious Indian ice cream with these flavors melted into liquid form. Just so creamy and delicious. A liqueur you honestly you didn’t know you needed, but can’t imagine being without once you’ve tried it!

Like I said, this “somnog” or “nogrus” or “eggrus” (okay I’ll stop) is one of the yummiest holiday drinks and so perfect if you’re spending the holidays with your parents/relatives! It incorporates many of the flavors your parents (and you) love in chai or mithai (Indian sweets). So without further ado, here’s the recipe for this deliciousness of a cocktail!

Tips:
The Somrus liqueur I used is Somrus Original. They’ve rebranded and now also call it Somrus Chai. So if you don’t see the original one, don’t freak out. Somrus Chai is the same thing.
They also have two other flavors: Somrus Mango & Somrus Coffee. I’ve tried Somrus Mango and it’s so yum! Just like Indian mango ice cream. I think both could easily substituted for the original in this recipe and would make an equally yummy cocktail.
I usually garnish with some pomegranate seeds and nutmeg/cinnamon on top. This time, I didn’t have pomegranate seeds on hand and garnished with some blueberries instead. You can also add a dash of cinnamon, crushed peppermint candy, a candy cane, or even a cinnamon stick.
If you don’t want to add egg white, it’s totally fine and feel free to skip it. It’s used to add the frothiness, but not necessary.
You can use store bought simple syrup or make it at home. Super simple – equal parts sugar and water. Boil together until sugar completely dissolves and cool down to room temperature. Can also store in the fridge for up to 2 weeks.
If you cannot find Somrus, don’t worry! You can also make this with Rumchata, a very similar cream-based liqueur. It won’t have all the flavors of Somrus but has cinnamon and vanilla which would also be perfect for this holiday recipe!

Somrus Nog

  • Servings: 1
  • Difficulty: 2
  • Print

Delicious Indian-fusion cream-based holiday drink.

Ingredients

– 1 oz bourbon
– 1 egg white
– 1 oz simple syrup
– 1.5 oz Somrus liqueur
– A few pomegranate seeds or blueberries
– A dash of nutmeg or cinnamon
– Ice

Directions

  1. Add the bourbon, egg white, simple syrup, and Somrus into a cocktail shaker.
  2. Shut tight and shake vigorously until it’s frothy or if you’re not adding egg white, for about a minute.
  3. Add ice, shut tight, and shake again for 30 seconds.
  4. Pour out into a glass.
  5. Top with pomegranate seeds/blueberries and nutmeg or cinnamon. Also can add any other garnish of your choice.
  6. Cheers!


Drink up, grinches! Hope this turns out to be your new favorite holiday cocktail! Merry Christmas Eve, my loves!

xo,
S

Snowball Cookies


Hi guys! Today, I’m back with one of my very favorite holiday cookie recipes! Snowball cookies are these yummy little sugar delights which are sure to have everyone raving about your baking skills. They’re super simple to make and just so festive and cute to add to your Christmas spread! This recipe is adapted from my cousin who always makes these and they’ve easily become a family favorite. I hope you love them as much as I do.

Also, these are great cookies to set out for “Santa” with some milk. I’m sure you parents will love waking up to devour these in the middle of the night! They also have very finely chopped nuts so your kids will barely notice them if they’re picky about those things, and hopefully gobble them all up! Happy eating and happy holidays to you and your loved ones!

Tips:
– You can substitute any nuts you prefer in the recipe and have more of one than the other, or even simply just stick to one. I use walnuts, almonds, and cashews. You can also add pecans and some peanuts if you’d like.
– You can use two sticks of salted butter instead if you don’t have unsalted. Just don’t add the extra salt that’s in the recipe.


Snowball Cookies

  • Servings: about 40 cookies
  • Difficulty: 2
  • Print

Sugar coated snowball cookies that are perfect for your holiday spread.


Ingredients

  • 2 sticks of unsalted butter at room temperature
  • 2 cups finely chopped nuts (I add a mix of walnuts, almonds and cashews)
  • 2 cups all purpose flour
  • 1/3 cup of pure cane granulated sugar
  • 2 tsp vanilla extract
  • 1 tbsp water
  • 1/2 tsp salt
  • 1 1/2 cups powdered sugar

Directions

  1. Preheat oven to 325 degrees.
  2. Take a large bowl and add butter, sugar, vanilla extract and water.
  3. Take a mixer and slowly cream all the ingredients. together.
  4. Add in the flour in 1/2 cup increments and mix in slowly.
  5. Add in salt and the chopped nuts. Mix well.
  6. Roll the batter into small balls about the size of a walnut and set on a cookie sheet.
  7. Bake in the oven for about 20 minutes.
  8. While the cookies are baking, add powdered sugar in a large bowl or plate.
  9. Once cookies are done, take out and let them cool down for 5 minutes.
  10. Roll the cookies in powdered sugar while they’re still warm.
  11. Ready to serve in your favorite cookie platter!

Perfect for gifting to family and friends.


Happy eating and happy holidays to you and your loved ones! Stay safe, healthy and merry!


xo,
S

Tandoori Potato Wedges


Potato is one my main food staples. You can make them in so many different ways and best part is that potatoes basically cater to any person. You could be a herbivore or carnivore and still reach for those extra side of fries on the table. And let’s be honest, is there anything better than fries?

This tandoori take on potato wedges is my absolute favorite. I love how versatile they are and you can make it as a snack, an accompaniment to your favorite burgers, or even as an appetizer. I used both regular russet potatoes as well as sweet potatoes. Both are amazing when made this way and I just wanted to show you guys that you can do it with any kind. I obviously don’t discriminate against any potatoes, as you can see. I hope you guys love this recipe! By the way, I always pair this with a yummy coriander or mint chutney and/or some delicious chipotle mayo.

Tips:
These are also perfect to make in the air fryer. I actually think this is the perfect recipe for it. My recipe will tell you how to bake them in the oven, but if you own an air fryer, I highly recommend making these in one. They’ll turn out even crispier and be done in a fraction of the time. Just pop them in the air fryer for about 15 minutes on 375-400 degrees. You won’t regret it!

Tandoori Potato Wedges

  • Servings: 4
  • Difficulty: 2
  • Print

Delicious potato wedges seasoned with spicy tandoori masala that everyone will reach over the table for!


Ingredients

  • 2 large sweet potatoes or 3 large russet potatoes
  • 4 tbsp vegetable or olive oil
  • 1 tbsp ginger garlic paste (optional)
  • 2 tbsp salt
  • 1 tbsp black pepper
  • 3-4 tbsp red chili powder
  • 2 tbsp coriander powder
  • 1 tbsp cumin powder
  • 1 tbsp garam masala
  • 2 tbsp tandoori masala (optional)
  • Pinch of chaat masala
  • Kasturi methi or coriander for garnish

Directions

  1. Cut potatoes into thick wedges.
  2. Take a large bowl and add the wedges into it.
  3. Add oil and coat wedges well.
  4. Add the ginger garlic paste and coat the wedges. (optional)
  5. Add in all the spices – salt, black pepper, chili powder, coriander powder, cumin powder, garam masala and tandoori masala.
  6. Toss all the wedges together in a bowl either with tongs or your hands.
  7. Make sure all the wedges are well coated. Set aside and let marinate for 10-20 minutes.
  8. Preheat oven to 350 degrees.
  9. Spread out wedges on a nonstick baking tray
  10. Bake for about 25 minutes until golden brown on edges and soft throughout.
  11. Plate and add a pinch of chaat masala on top.
  12. Garnish with coriander leaves or kasturi methi (dried fenugreek leaves).
  13. Bon appetit!


I’ve added some photos below that you can refer to while cooking!

Cut your choice of potatoes into wedges, as shown above.
All the ingredients you’ll need.
How wedges should look after marination.
Ready for the oven!
Ready to serve!

Indo-Chinese: Chili Paneer


Indo-Chinese food is a tier all on its own. I love this cuisine so much and I feel not enough people in the world are familiar with it. Of course, it’s a staple for most Indian households, but so many are unaware that this type of cuisine exists and are missing out on all of its deliciousness.

I adore the fusion of Indian and Chinese flavors. They’re so bold on their own and to mix them together is just divine. Seriously, kudos to whoever thought of this. I would’ve never imagined fusing these two cuisines together otherwise.

Today, I’m bringing to you a super popular Indo-Chinese recipe – Chili Paneer! Paneer is a delicious soft cheese very common in Indian cooking and it goes perfectly with the “Chili” aspect of Chinese cooking. This dish is a fan favorite amongst both vegetarians and non-vegetarians. My recipe is a bit on the spicier side and you can totally turn down (or up) the spice according to your personal preference.

Some tips before we proceed:

– Frying: You can deep fry or shallow fry the paneer. I usually stick to shallow frying since the paneer is easy to handle and turn in the oil. And much less amount of oil is used which is plus. Also, be sure not to overcook the paneer. 2-4 minutes is more than enough otherwise the paneer will get hard and rubbery.
– Chili Powder: Adding red chili powder in the batter is totally optional. Like I said, I love everything spicy so I’m always incorporating it in any way I can.
– Oil: The oil you use won’t make a huge difference. However, sesame oil is highly recommended because it adds a lot of depth to the flavor of this dish. I don’t always have sesame oil in the pantry and often resort to vegetable oil which works just as fine.
– Vinegar: You can use rice or apple cider vinegar but if you don’t have them on hand, don’t fret. A dash of white vinegar will do just fine.
– Green chillies: Once again, these are totally optional. If you’re not big on spice, I’d skip these since they add quite a kick to the dish. Just the chili sauce should suffice in this case.
Garnish: You can garnish this dish with many different things such as toasted sesame seeds, coriander, scallions, or even some celery.
Serve: You can serve this as an appetizer or pair it with some rice and make a main course out of it.

Chili Paneer

  • Servings: 4
  • Difficulty: 3
  • Print

A popular dish that incorporates flavors from India and China to make it a unique and delicious meal.


Ingredients

    For batter & frying:

  • 1/2 cup frying oil (I used Canola)
  • 12 oz paneer – cut into cubes
  • 3 tbsp all purpose flour
  • 3 tbsp cornstarch
  • 2 tsp salt
  • 2 tsp ground black pepper
  • 1 tsp red chili powder (optional)
  • 1/2 cup water
  • For the sauce:

  • 3-4 tbsp sesame or vegetable oil
  • 1 bell pepper – cut in small squares
  • 1 medium onion – cut in small squares
  • 2 tbsp chopped ginger
  • 2 tbsp chopped garlic
  • 2 green chillies – sliced lengthwise
  • 2 dry red chillies
  • 2 tbsp soy sauce
  • 3 tbsp chili sauce
  • 1 tbsp ketchup
  • 1 tsp rice or apple cider vinegar
  • 1 tbsp sugar
  • 1/4 cup water
  • For the slurry:

  • 1 tbsp cornstarch
  • 3-4 tbsp water

Directions

  1. Heat up 1/2 cup oil in pan. I shallow fry the paneer. You can also add more oil and completely deep fry.
  2. Take a large bowl and add all the dry ingredients for the batter.
  3. Mix in water slowly and you can add a tbsp or two more if consistency is too thick.
  4. Add in the paneer and coat paneer well with batter.
  5. Once oil is heated, transfer paneer to the pan and start frying.
  6. Fry both sides for about 2 minutes. Drain excess oil and transfer to a plate lined with a paper towel once paneer is slightly golden brown.
  7. In a small bowl, add a tablespoon of cornstarch with 3-4 tbsp of water and mix until cornstarch dissolves. Set aside.
  8. Heat up 3-4 tbsp of oil on medium heat in a separate pan.
  9. Add the garlic, ginger, and dry red chillies to the pan.
  10. Sauté until ginger and garlic is fragrant and golden brown.
  11. Toss in bell pepper and onion.
  12. Sauté veggies until fragrant. Make sure they stay crunchy.
  13. Add soy sauce to the veggies and cook for one more minute.
  14. Toss in the green chillies.
  15. Now add the chili sauce, ketchup, vinegar and sugar into the mixture. Cook for a minute more.
  16. Add in your cornstarch slurry. Mix in for 2-3 minutes until sauce thickens.
  17. If the sauce thickens too much and you prefer it at a thinner consistency, add 1/4 cup water in and stir well.
  18. Transfer to a bowl and serve!


I’ve added some photos below that you can reference to step by step.

Hopefully this will make the entire process smoother for you!

Consistency of the batter should be as shown above.

The amount of oil I use for shallow frying is covers half the paneer cube. Fry until golden brown like above.
Ginger, garlic and dry red chillies sautéed in a pan until golden brown.
Veggies should look like above after soy sauce and green chillies are added.
Sauce and its consistency if you want a semi-dry chili paneer.
Final product once paneer is added.
Ta-da! Bon Appetit!


Hope you guys enjoyed this recipe and please message me if you try it out or have any questions at all. I’d love to see your pictures and how it turned out! Feel free to tag me or message me on Instagram – @sassysherni.


xo,
S